
Let’s be trustworthy, ‘cinematic’ lighting is sort of the brand new C-word in our business in the mean time. Lots of my older readers might keep in mind a time when purchasers would ask for his or her photos to be extra ‘edgy’, and now the ‘cinematic’ phrase is rapidly changing into a equally esoteric buzzword that’s merely far too overused. However can we distil this all-encompassing development right into a easy and efficient setup? Let’s have a look.
I’ll be upfront from the get-go right here. That is an introductory lighting setup designed to whet your urge for food for the world of cinematic studio lighting. Should you just like the look of this, please check out my now very fashionable ‘Cinematic Studio Lighting Workshop’. This new course takes issues a fantastic deal additional past this easy setup as we go over how photographers are sorely underutilising so many extremely efficient cinematography strategies. I’ll present extra particulars on the finish of this text when you’re .
Compulsory self-promotion apart, let’s look at some core tenets of the ‘cinematic’ look and attempt to incorporate them into our easy but participating lighting setup.
Upstage Lighting
That is an attention-grabbing and international idea to us stills shooters, however I want you to keep in mind that the themes on display screen NEVER look into the digicam! In each movie you’ve ever seen (4th wall-breaking artwork movies apart), the themes by no means take a look at the digicam, and this implies cinematographers mild their topics very otherwise from us. The place we use key lights in entrance of our topics, cinematographers will typically use lights behind or ‘up-stage’ of their topic.
Web page 28 of 61 from my Cinematic Studio Lighting PDF
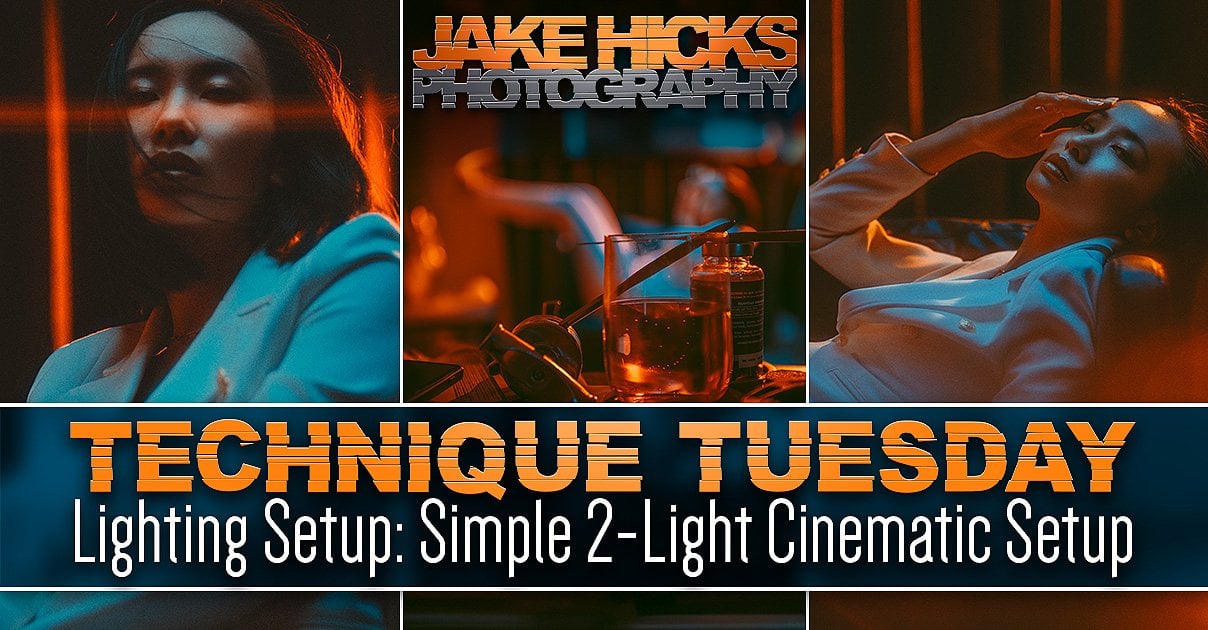
Within the above photos, you possibly can see precisely what I imply. No one seems to the digicam, so the sunshine is usually behind them, and that is known as up-stage lighting. The type does imply that it solely works when the topic seems away from the digicam, so you want to preserve this in thoughts in your interpretation of cinematic lighting. Would you like your topics trying to digicam? If that’s the case, you’ll want to regulate the sunshine accordingly, and for the setup, I’ll show under, I opted to take the inspiration of the upstage mild and have a robust mild from behind, however I additionally needed my topic to have the choice to look to the digicam. With this in thoughts, I saved the sunshine pushed again and put extra of a robust backlight off of the face.
This straightforward but crucial factor that characters by no means look to digicam in cinematic seems is a really highly effective software. Being cognizant of this choice will rapidly and dramatically alter the way in which you mild your topics, as many people are so engrained to mild our topics with the power to look to digicam. I’ll be trustworthy: as a style and portrait shooter of over 20 years, it’s extraordinarily laborious for me to not have my topics look to digicam, however I’d urge you to strive it as a private challenge on the very least.
Depth and Ambiance
Should you ever needed to know the worst-kept secret of the way to obtain the ‘cinematic’ look, it’s ambiance. And by ambiance, I imply simulated depth.
For many people studio shooters, depth is fairly easy; spend two grand on an f1.2 lens and name it a day (you already know who you’re). As studio shooters, we sometimes solely have two planes of depth, the topic and the background…. that’s it. Why is depth so essential? In the end, it’s about managing that depth and figuring out what’s essential within the scene. For us within the studio, it’s the topic, and it’s extraordinarily straightforward to make that topic a precedence when there’s nothing else within the body for the viewer to take a look at. Nonetheless, far grander movie units have a whole lot of distracting parts that may probably pull the viewer away from the significance of the character. Certain, a colossally broad aperture lens helps to throw the background out of focus, however generally that’s not all the time the reply.
I do know, I do know. It’s tantamount to heretical doctrine to even recommend that the widest attainable aperture isn’t all the time the reply however set down your pitchforks and listen to me out.
Usually in cinema, the scene or background is essential to the character and story, merely throwing it utterly out of focus isn’t the reply. As a substitute, many scenes will make use of smoke, haze and different strategies to subdue the background within the scene while nonetheless permitting it to be related and recognisable. There are a mess of causes for doing this, however finally, it’s about separating the topic from the background in order that we’re instantly drawn to the topic in a refined and plausible means. You may’t simply throw a highlight on the topic, the topic must exist organically within the scene so as an alternative of lighting them extra dramatically than the background like us studio shooters would do, cinematographers typically choose to subdue the background somewhat than merely spotlight the topic.
Web page 19 of 61 from my Cinematic Studio Lighting PDF
For bigger units, haze is a very simple and really efficient software so as to add depth, but it surely’s not all the time sensible. I’ll say that you probably have time and are in a position to, haze does provide the greatest outcomes and most plausible depth, but when that’s not attainable for the aforementioned causes, a lens filter is a superb substitute in a pinch, and it’s really what I used on this setup I’ll go over it in additional element under.
Color Distinction
The concept of color distinction is extra stylised and extremely depending on the challenge after all, however the fundamental precept of drawing consideration to the topic with distinction is all the time relevant, it’s simply that we’ll be using color as a software in addition to the fundamental luminance distinction. For instance, David Fincher is a grasp of luminance distinction in his movies. Lots of David Fincher’s motion pictures have a darker, extra sinister plot, and lots of of them are shot at night time. Se7en is a superb instance of this, as there may be really little or no color distinction in that, however the lighting is impeccable, and each factor is seen with out being overly lit, as he’s a grasp of the checkerboard type of sunshine. Counter to this are lighter (in temper) motion pictures, which can typically use color distinction in a scene that’s extra evenly lit. Wes Anderson is an apparent instance of this, and he’ll typically forgo any try at ‘regular’ colourings in favour of what merely seems greatest visually.
I make the very actual distinction between luminance distinction and color distinction right here as a result of they each play a significant function in understanding the way to manipulate mild and temper in a scene. I spoke about David Fincher’s movie Se7en earlier. That’s a film about chasing a serial killer, and also you wouldn’t mild that with smooth washes of color and lightweight. As a substitute, he opted for sturdy distinction and edge mild that leaves an space of darkness that instils unease and stress within the viewer. It is advisable to know what you’re making an attempt to say along with your picture or portrait and select acceptable lighting.
Web page 16 of 61 from my Cinematic Studio Lighting PDF
Within the above picture, you possibly can see some examples of color distinction. The highest left is the obvious as I bathe the topic in a really refined blue tone after which mild the background with an orange glow. On the highest proper, I take advantage of color distinction within the topic’s outfit to make them stand off from the background, however I’m additionally utilizing a really laborious mild on them to extend the color distinction within the clothes. You might have missed it, however take a look at the razor-sharp chin shadow once more. See the way it’s a really laborious mild illuminating her, but it surely’s crammed in with fantastically smooth mild as effectively. That is an especially efficient hard-light approach that isn’t tormented by heavy, visually distracting shadows.
Lastly, take a look at the underside picture and see how utterly completely different the black-and-white model is. That is the very highly effective distinction between luminance distinction and color distinction. The color shot on the left attracts us to the face and separates it from the considerably dominant environment, whereas the black-and-white model loses all depth as a consequence of all of it being of an identical luminance.
Studying the way to drive visible course with color is essential and also you merely can not depend on the fundamentals of lighting ratios and lightweight meters to direct consideration in a scene. Having a agency grasp of visually dominant and recessive colors will rapidly elevate your photographs.
The Setup
I’ve lined a number of of the fundamentals above and upstage lighting, atmospheric depth and color distinction are simply a few the ‘cinematic’ triggers that you simply’ll typically see in motion pictures. However let’s now take a look at using a few of that data in our easy 2-light setup.
First off, let’s take a look at the setup itself. Then I’ll clarify a number of the finer particulars under to hopefully reply a number of the questions you’ll have.
The grid isn’t strictly obligatory, but it surely was on and it isn’t hurting.
Right here you possibly can see simply how shut that high mild is to the mannequin.
ZHIYUN G300 might be positioned very near the ceiling
Observe: Shutter pace too quick for the LED display screen right here
ZHIYUN X60 set to its warmest Kelvin of 2700K
JHP Patent Pending Pile’o’Crap – AKA Shiny/Translucent Foreground Parts
TL;DR/ADHD/Artist Setup Clarification
Setup curtain backdrop with folds to catch mild
Place 90cm softbox immediately above the topic
Regulate this to be ‘chilly’ AKA 6500K
Place smaller laborious mild again behind the topic and up excessive angled down
Regulate this to be ‘heat’ AKA 2700K
Attempt to place this to mild the mannequin, hit the digicam and likewise scrape throughout the backdrop
Embody shiny/translucent foreground parts in entrance of the digicam lens
Package Used
1x ZHIYUN Molus G300
1x ZHIYUN X60
1x 90cm Parabolic Softbox
1x Naked Reflector Dish
1x Massive Brown/Gray Curtain
Foreground Parts
Lens Filters
Digicam Settings
Digicam – Nikon D850
Lens – DC-Nikkor 105mm f2
Shutter Velocity – 1/one hundred and twenty fifth
Aperture – f2
ISO – 100
Kelvin – 4600K
Focal Size – 105mm
The Outcomes
Breaking it Down
The excellent news is it’ll be fast. In any case, there are solely 2 lights, so how sophisticated can or not it’s? However as we tentatively navigate round complacency, there are nonetheless a number of core artistic parts that I’d such as you to contemplate and regulate to your individual style.
Upstage Lighting
You’ll want to find out how a lot you wish to lean into this type your self however to remain true to the upstage look, you’ll want to think about that sturdy, laborious mild from behind as extra of your key mild. Which means it received’t typically look nice when the mannequin seems to digicam because it’ll awkwardly catch their nostril or worse. I do know I can’t assist myself, and I by no means do a shoot the place the mannequin doesn’t look to digicam for a number of the greatest photographs. So I typically choose to be impressed by the upstage look, however push the sunshine additional round behind so it received’t catch the nostril. I’d urge you to experiment with the look, although, and see what works for you.
Depth & Ambiance
Arguably, among the best elements of the cinematic look is the ambiance and visible refractions you will get away with. A simple trick for this cinematic haze is to make use of lens filters. I personally suppose precise haze is greatest for the true depth look, but when time or environmental limitations forestall that, a lens filter is a superb substitute. I’ve tried scores of those filters over time, and you may see which of them I choose right here: Cinematic Lens-Flare Filter Comparability. In the end, you’re after a lens filter that can add somewhat flare to the picture, and you will get ones that produce all the pieces from blooms within the highlights, lowers distinction, simulates haze and even ones that pretend the anamorphic horizontal flares.
Lens Filters
Should you’re inquisitive about how a lot these filters are doing in a shoot like this, I shot with a number of filters on and off on this shoot. So listed here are the examples when you missed them above.
No lens filter hooked up – You may see no flare in any respect
Customary bloom-style filter – Very distinctive flaring and blooming
Anamorphic flare filters – a really distinctive, but subjective look
These 3 photos present a superb vary of seems, and as you possibly can see, lens filters can play a really vital function in how the ultimate picture seems.
The preferred selection is arguably the bloom-style filter, and you may see that it creates giant flares with mild hitting it. Should you look fastidiously, you’ll additionally see it blooming off of brilliant highlights, just like the mannequin’s cuff button, too.
Color Distinction
A really well-established and well-liked approach utilized in many TV exhibits and films right now is the color distinction seen between both finish of the Kelvin scale. Sure, the orange and teal look is arguably overused right now, however hey, I used to be doing it earlier than it was cool so that you’re simply gonna should stay with it! Ego apart, the concept of blending Kelvin distinction is important to know and it’s not too difficult, you merely have some lights far hotter than different lights which are far cooler.
On this setup I had the again, upstage mild set to be very heat at 2700K and the sunshine above at a cooler 6500K. The trick then is to set your digicam Kelvin someplace between the 2 so that you get each blue and orange tones current within the shot and for this specific shoot, I used to be round 4600K.
Foreground Parts
Many cinematic units and areas are sometimes pretty small, particularly when you’re capturing on-site or in a house studio. One very sturdy factor of a cinematic look is depth, however how will we create depth the place there may be none?
Depth in a scene is essential because it helps lead the viewer by means of it or into it, and having foreground parts within the body is a simple means to try this, so what will we do when these foreground parts merely aren’t there or extra sometimes, aren’t in the suitable place? The easy answer is to pretend them, and you are able to do this in any variety of methods, however I typically choose to seize random parts from the scene round me and place them within the foreground of the shot to aim to make it somewhat extra plausible. As you possibly can see within the above BTS shot, I actually am grabbing any random object that can catch the sunshine.
I’ll share a few suggestions for this, however the greatest one is that this foreground factor impact actually solely works when a lightweight behind the topic fires again into the lens. That mild will catch on all of those objects and, in flip, refract and flare into the lens.
In case you weren’t certain what I meant by ‘foreground parts’, it’s these very out-of-focus bokehs and distortions.
We additionally wish to discover parts that can replicate or catch the sunshine. Consider something silver or reflective, and right here, I’m even utilizing cutlery clamped into C-Stand knuckles to get the shine the place I need it. One huge tip is to make use of glasses of water. You may all however assure each location can have a glass and a few water, however this combo works so effectively as a consequence of it refracting and distorting the sunshine that enters it. You may even see the very clear distortions within the picture proven above too.
Couple all of this with mild pointing in direction of the digicam, a flowery lens filter and a really broad open aperture, and the foreground parts might be very seen.
Closing Suggestions & Factors to Keep in mind
As I said firstly, the phrase ‘cinematic’ is, in my view, fairly often overused. Right now, almost all the pieces with a fundamental Lightroom Preset on Instagram is known as cinematic. However the overuse is solely as a consequence of how well-liked the concept of the cinematic type is. If we will perceive and utilise what made that type so well-liked to start with in our personal work, we’ll probably create some very participating imagery.
Certain, you possibly can slap a cool-looking Lightroom Preset on any picture and it’ll look extra ‘cinematic’, however there are much more parts we will incorporate into our setups to get the perfect from this well-liked type.
With that in thoughts, let’s recap a number of the core tenets of the cinematic type.
Upstage lighting – Attempt to mild your topics with a robust mild from behind. Couple this with a fill-light in entrance and so long as the topic seems away from digicam, you’ll rapidly develop a cinematic aesthetic with mild alone.
Depth & Ambiance – That is the best option to get that cinematic look and whether or not you’re merely including smoke from a can at a marriage to get these ‘god-rays’ otherwise you’re filling a whole studio with haze to get a dramatic sci-fi night time shot, faking ambiance is extraordinarily highly effective.
Color Distinction – Though orange and teal are sometimes overused right now, you can not ignore the ability of efficiently utilizing contrasting colors, particularly ones on the Kelvin scale, so as to add drama and separation to your scene. Don’t simply take a look at luminance distinction, pay very shut consideration to color distinction as effectively.
Foreground Parts – That is simpler to do than it first seems and sure you probably have one thing on-site that you would be able to shoot by means of or previous then excellent, however don’t be afraid to get artistic with foreground parts and positioning reflective and translucent objects in entrance of the lens is a strong visible look to guide a viewer right into a body.
Compress the Scene – Merely put, use a protracted lens. Though this isn’t a strict rule, a lot of cinema is shot on longer lenses as a whole lot of what makes a strong scene, is an in depth shot of a topic with minimal distractions. Roughly translated to stills-photography, look to make use of an 85mm or 105mm lens to get the perfect outcomes.
Blur the Background – You guessed it, shoot broad open! Lots of you’re already doing this, however capturing on a wide-open aperture is a simple option to scale back distracting parts in a scene. Blurring the background retains the visible energy on the topic and never the doubtless distracting parts behind them.
Shoot Panorama Orientation – As portrait shooters, that is very laborious for us to do, however sure, the plain trait of cinematic-looking photographs is, after all, to shoot in panorama orientation… However after 20+ years of portraits, I fail at this, so do what I say and never what I do!
Bonus Tip:
Add somewhat grain – this one is extra subjective, however a whole lot of cinematic seems are paying homage to movie and by movie, I imply the analogue sort. A lot of cinema is about nostalgia, and with that comes the romantic reminiscence of older motion pictures, and lots of of them have an natural look because of movie grain. In the entire photos right here, I experimented with a brand new LR Preset from a buddy of the group VMoldo. He despatched over a brand new means of making use of grain to photographs with masks for luminance values in every picture, which produces a extra pure and plausible grain than merely making use of it uniformly all through the shot. Should you’re , head over and check out his Filmic Tone Limiter
Good luck when you’re making an attempt this setup. Let me know the way you get on, and as all the time, you probably have any questions, hearth away within the feedback under.